Video Overview
-
-
Robot Arm Box
-
Controller Box
-
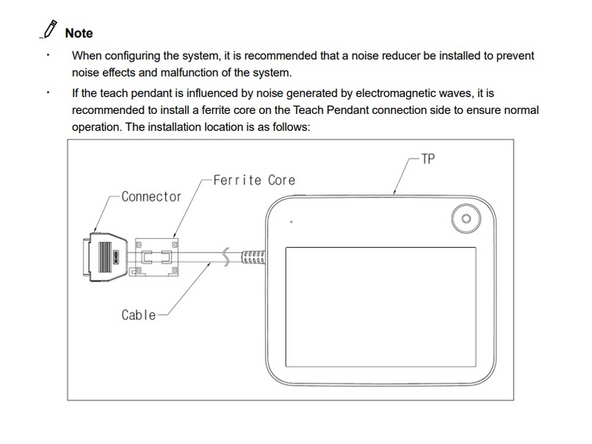
Teach Pendant
-
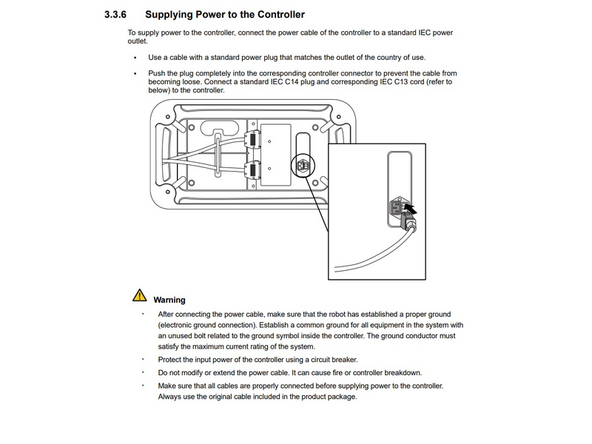
Controller power supply cable
-
Manipulator Connection Cable
-
-
-
Confirm robot base bolt pattern matches with robot
-
Use M8 Bolts
-
5mm locator pin
-
Install the manipulator base on a solid surface that can withstand the load generated during operation (10 times the maximum torque and five times the weight of the robot)
-
The robot will interpret manipulator base vibration as a collision and engage the emergency stop. Therefore, for installation locations that automatically shift position, do not install the robot base in a location with high movement acceleration
-
The manipulator will be damaged if it comes in contact with water for an extended period of time. Do not operate the robot in conditions where it can get wet or under water.
-
-
-
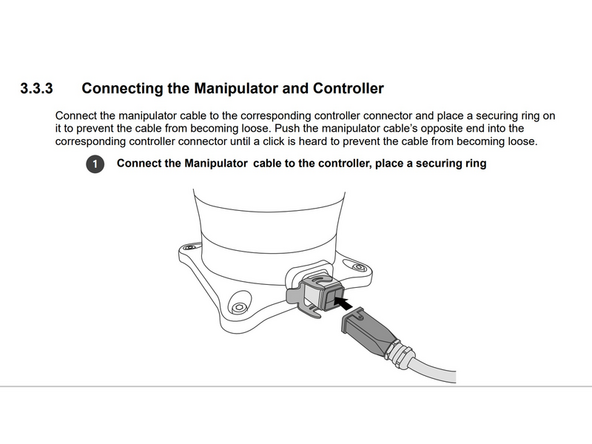
Connect the Manipulator cable to the controller, place a securing ring
-
-
-
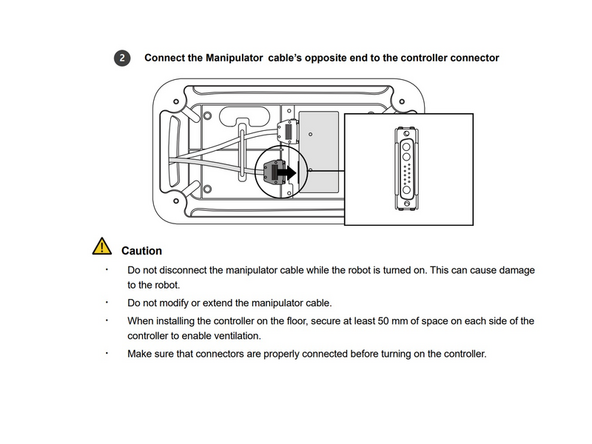
Connect the Manipulator cable to the controller, place a securing ring Connect the Manipulator cable’s opposite end to the controller connector
-
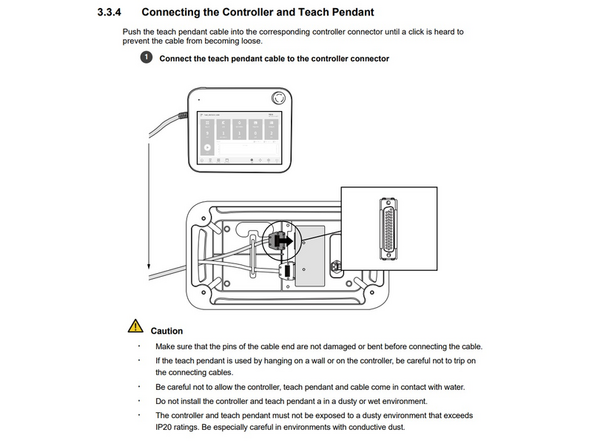
Two clicks should be heard if pushed in correctly
-
-
-
Insert wisdom here.
-
-
-
Insert wisdom here.
-
-
-
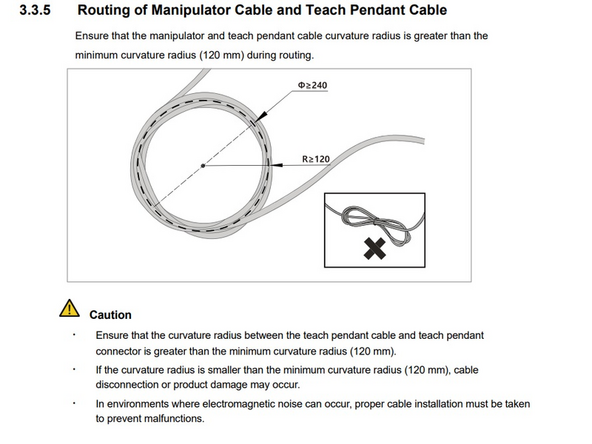
Minimum Radius of 120mm or 4.72 inches
-
-
-
Input Voltage 100-240VAC
-
Power supply with switch between 110V or 220V automatically
-