Introduction
This guide will help you to upgrade the SVM Firmware.
| * NOTE: To use an SVM on your cobot you need to update the License Code to activate this feature. |
| * You will need to contact the Doosan Robotics Support Team in South Korea and provide the model and serial number of your cobot. |
-
-
Robot LAB portal link
-
Go to Doosan Robotics LAB portal
-
Go to Partner tab
-
Go to Service Data tab
-
Download and unzip the Software Update Package version you need to update
-
Install DRST Click here to see full instructions. You can skip this process if you already have the DRST software installed.
-
In order to get the newest update version installed, the cobot needs to have all each previous updates packages versions installed e. g. If it is currently M2.3 version you need to install M2.4 before installing M2.5)
-
-
-
Go to Networks Connections
-
Right click on Ethernet and go to properties
-
Click on Internet Protocol Version 4 (TCP/IPv4)
-
Click Use the following IP Address
-
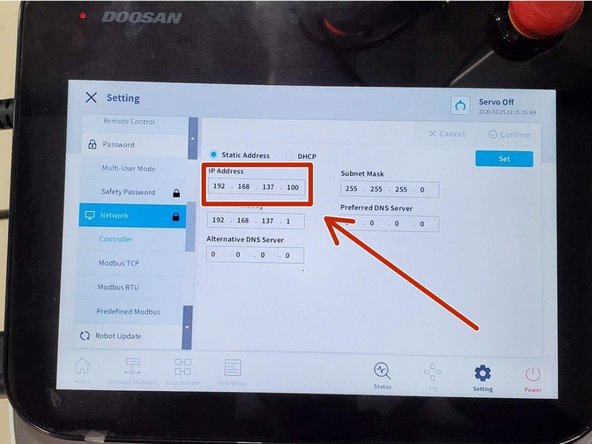
Set different IP Address between PC and Controller e.g. PC IP 192.168.137.99 (Robot Controller IP 192.168.137.100)
-
Set the same Default Gateway that is in the Robot Controller to the PC e.g. 192.168.137.1
-
Connect PC and SVM to the Robot Controller by (Ethernet cable)
-
DO NOT use the first Ethernet port in the hub from left to right as shown in the picture
-
-
-
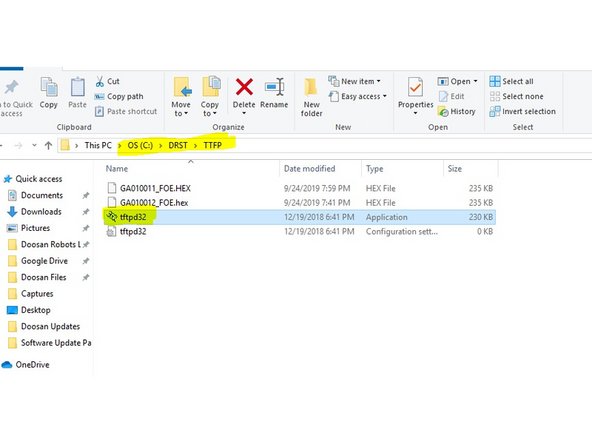
Go to path C:\DRST\TFTP
-
Run tftpd32.exe on
-
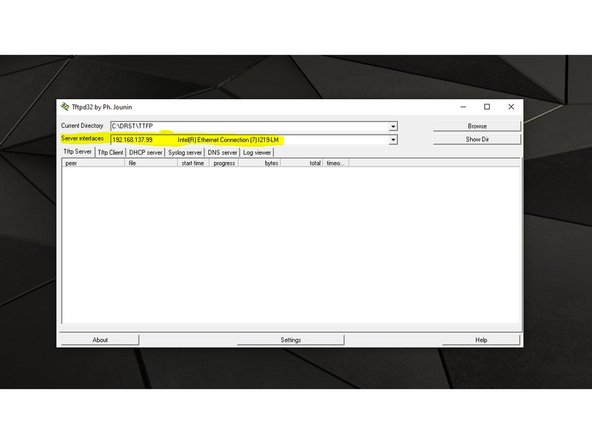
Select the Ethernet card connected with Robot Controller (it should has the same IP Address that you set up on the Ethernet Adapter properties IPv4
-
After selecting the Ethernet card just leave the window open and go to the next step
-
-
-
Make sure robot status is "Servo Off" LED Flange RED on robot arm (you can check this on Status on the Teach Pendant)
-
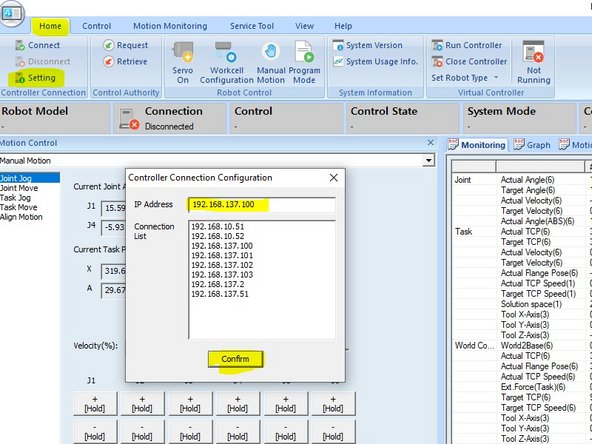
Go to Home tab and click on setting
-
Set same IP Address shown on the Teach Pendant of the Robot Controller and click on Confirm
-
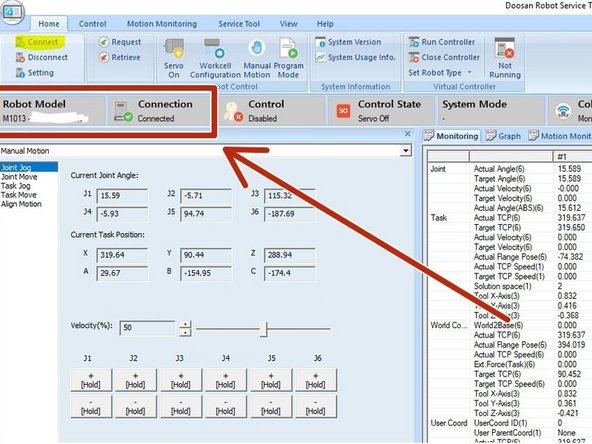
in the Home tab click on Connect
-
If the connection is successful, the Robot Model box will show the Model and Serial No of the Cobot and the Conection box will display Connected
-
If the connection is not successful please review step 4 and 5 again
-
-
-
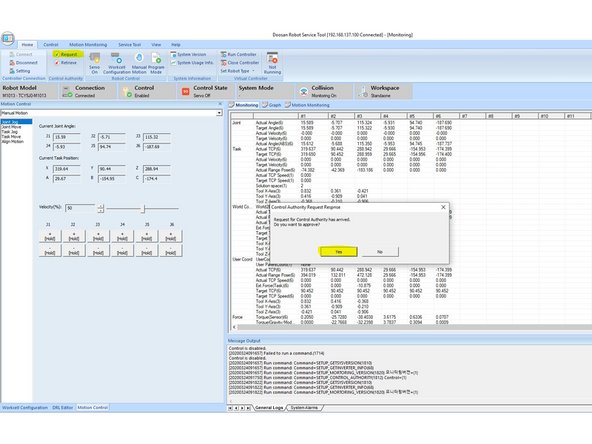
In the Home tab click on Request
-
Click OK on the Control Authority Request Response windows in the PC
-
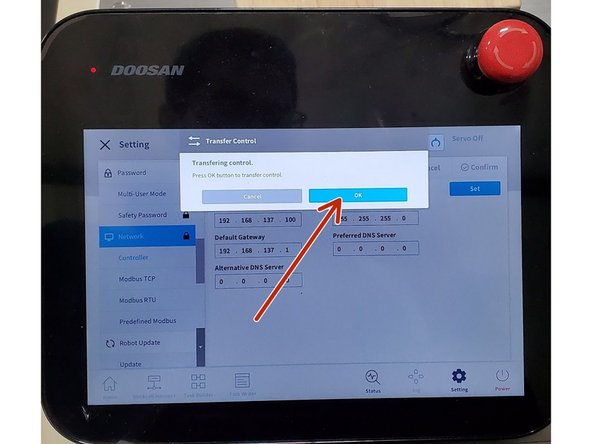
Tap OK in the Transfer Control Window that pops up in the Teach Pendant
-
-
-
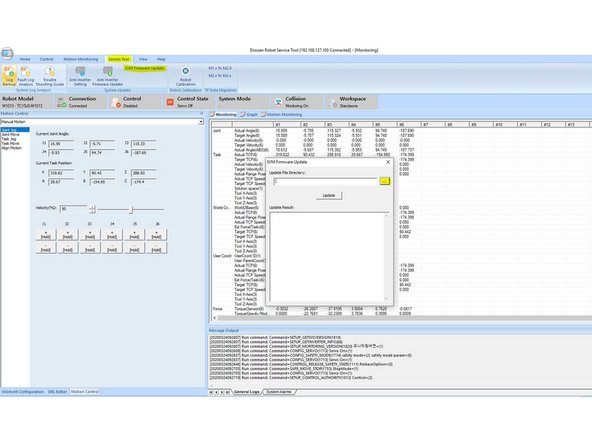
Go to Service Tool tab
-
Click on SVM Firmware Update
-
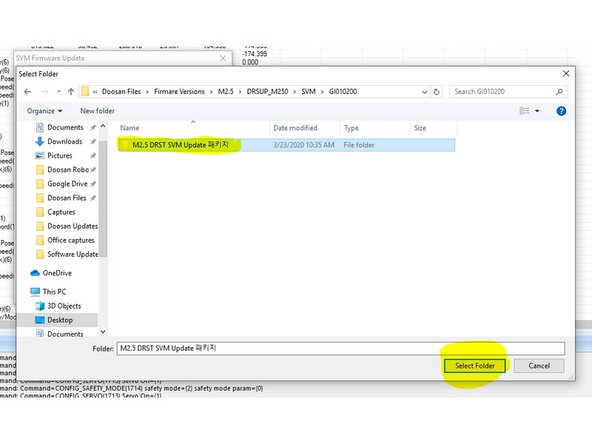
Click on the three dots in the SVM Firmware Update Window
-
Go to the SMV folder in the Software Update Package (make sure is unzip)
-
Select the firmware update folder directory and click on Select Folder
-
If you open the folder, items might not be shown due to format filters, just ignore that and select the main DRST SMV Update folder as you can see in the picture
-
-
-
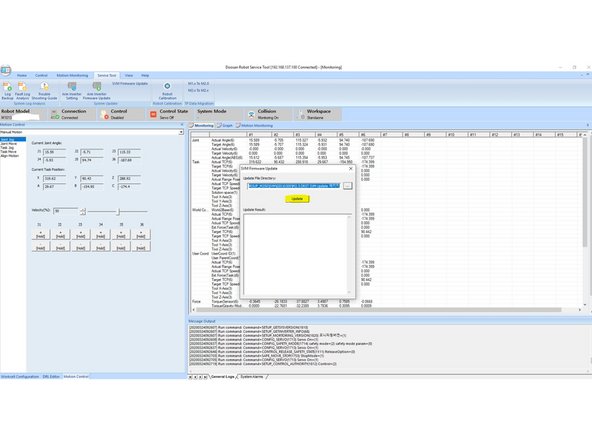
Click on Update button
-
When the update is completed, the result message is displayed
-
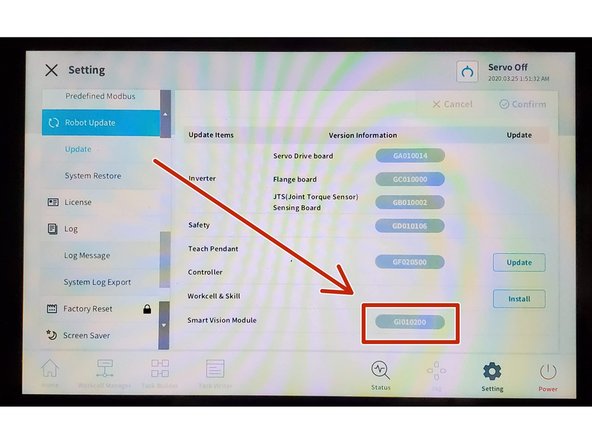
Restart the Controller then go to the Teach Pendant Settings and confirm the new Smart Vison Module version
-
If the update is successful, the successful pop up is displayed. If the update fails, the failure pop-up and the detailed message is displayed
-