Introduction
This guide provides explanations of the processes to update the Inverter, Main Controller, and Safety Board of the Doosan Robotics Cobots.
Note: Newer versions of cobots don't need to use an emulator for safety board upgrades (see in Step 14)
| * Be sure to read the RELEASE NOTE before proceeding update (Go to Step 3 to see how to find the Release Note of your update) |
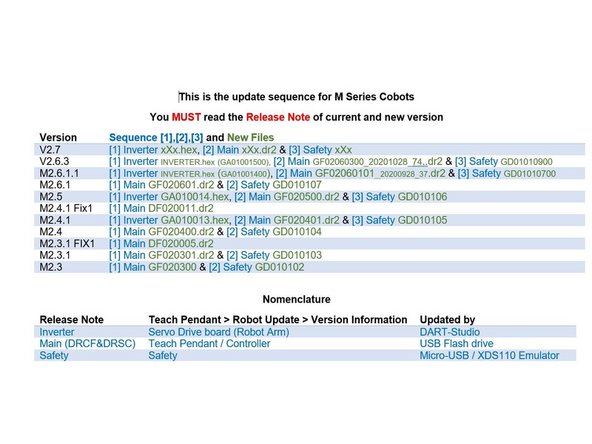
| * In order to get the newest update version installed, the cobot needs to have all each previous update packages versions and fixes installed. e. g. If the cobot is currently the M2.3 version you need to install M2.4 before installing M2.5. This is the update version order for M Series Cobots and what's needed to be update. See release note. M2.5 (Inverter GA010014, Main Controller GF020500 & Safety GD010106) M2.4.1.FIX1 (Main DF020011) M2.4.1 (Inverter GA010013, Main Controller GF020401 & Safety GD010105) M2.3.1 (Main Controller GF020301 & Safety GD010103) M2.3 (Main Controller GF020300 & Safety GD010102) M2.2.1 |
| * You need a Micro-USB cable or an XSD110 Emulator to complete the Safety Update (see below to get the link where you can order this tool) |
Tools
Parts
No parts specified.
-
-
Go to this guide for a full explanation of how to install DART-Studio
-
DART-Studio can only be used after a separate license key is issued by Doosan Robotics
-
-
-
For Cobots: M, H, and S series.
-
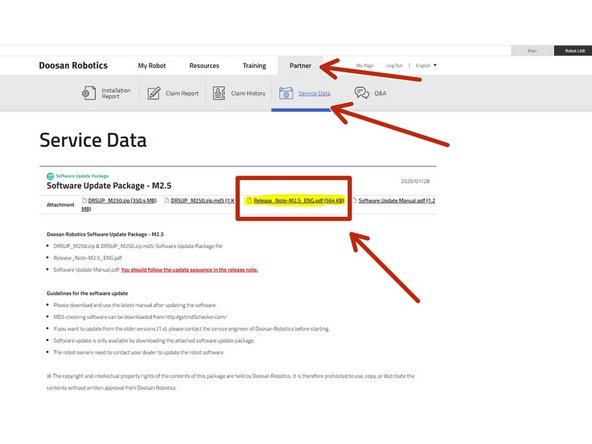
Go to Doosan Robotics LAB Portal
-
Go to Partner tab
-
Go to Service Data tab
-
Here is a link to Doosan Robotics LAB
-
Download the Software Update Package version you need to update
-
In order to get the newest update version installed, the cobot needs to have all previous updates packages versions installed e. g. If it is currently version M2.3 you need to install M2.4 before installing M2.5)
-
-
-
Find the Release Note in the next path Doosan Robotics LAB >Partner >Service > Update Package > Release Note.pdf
-
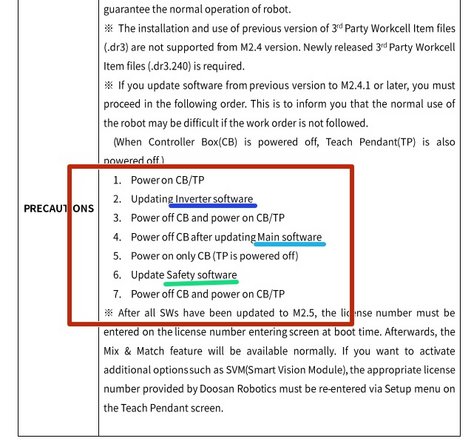
You must follow the update sequence in the release note of the version, otherwise a blank screen or another noticeable malfunction can occurs. If that happens contact your dealer.
-
If your cobot is M2.4 and you want to update to M2.4.1 you MUST check the previous Release Note which is M2.4 and make sure all the files installed match with the info displayed on the Teach Pendant Settings>Update
-
Update sequence:
-
1-GA – Inverter (Cobot Arm) updated by DRST (Doosan Robot Service Tool software) via Ethernet
-
2-GF – Main Controller by USB Flash Drive
-
3-GD – Safety update by Micro-USB or Emulator XDS110
-
-
-
Inverter Update Steps
-
-
-
1-GA – Inverter (Cobot Arm) updated by DRST (Doosan Robot Service Tool software) via Ethernet
-
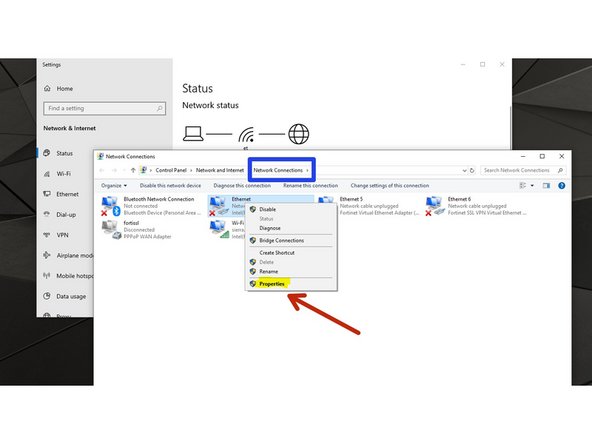
Go to --> Control Panel > Network and Internet > Network Connections (change adapter settings)
-
Networks Connections
-
Right click on Ethernet and go to properties
-
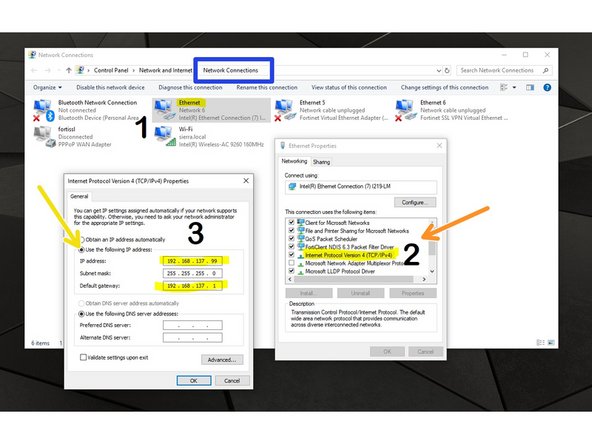
Double-click on Internet Protocol Version 4 (TCP/IPv4) to open its properties
-
Select Use the following IP Address
-
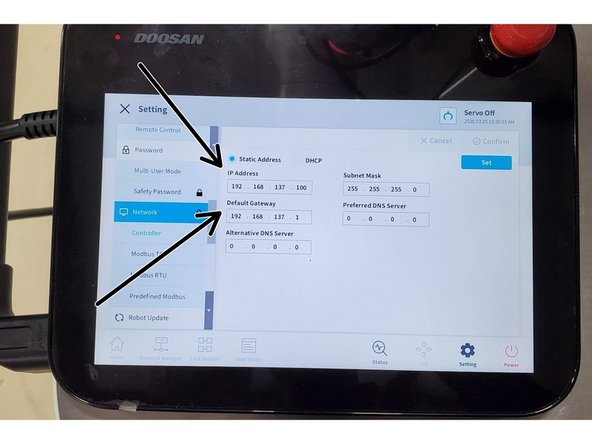
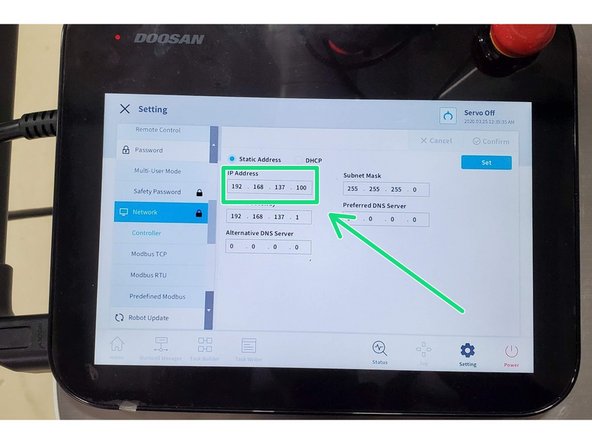
Set different IP Address between PC and Controller e.g. PC IP 192.168.137.99 (Robot Controller IP 192.168.137.100). The first 9 values must be the same, the last 1 to 3 values must be different
-
Default Gateway must be the same on Robot Controller and the PC e.g. Robot Controller: 192.168.137.1 PC Setting: 192.168.137.1
-
-
-
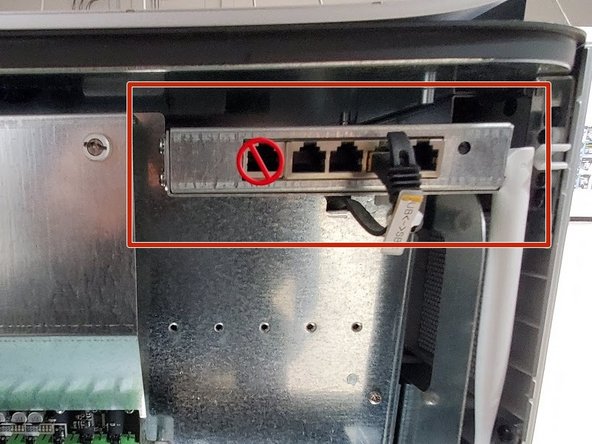
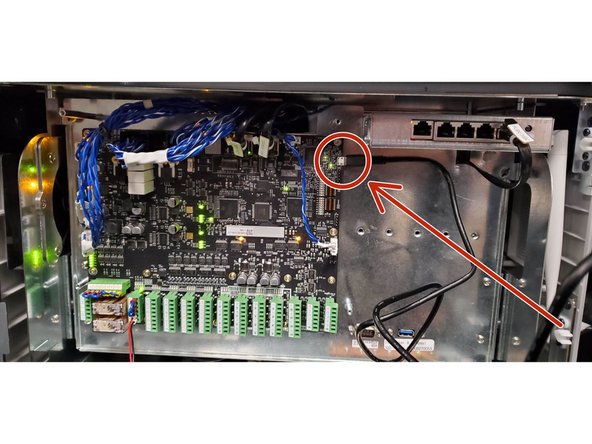
DO NOT use the first Ethernet port in the hub from left to right as shown in the picture
-
Connect PC and Robot Controller by (Ethernet cable)
-
-
-
Go to the Teach Pendant Setting/License and take note of the license key (If the controller reset or a system error occurs it will require you to enter the License Key manually)
-
Make sure to target the controller not the simulator
-
Make sure robot status is "Servo Off" LED Flange RED on robot arm (you can check this on Status on the Teach Pendant)
-
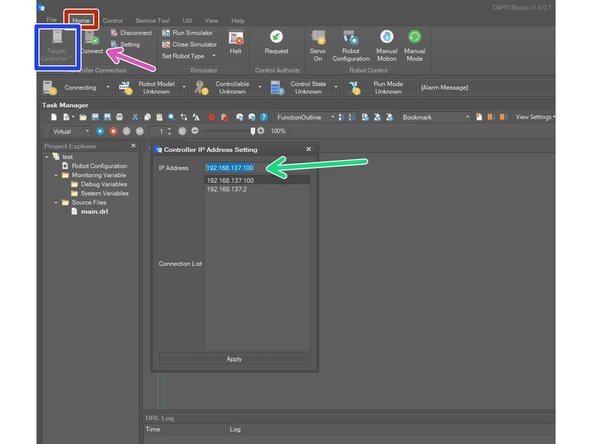
Go to Home on DART-Studio tab and click on setting at the top left corner
-
Set same IP Address shown on the Teach Pendant of the Robot Controller and click on apply
-
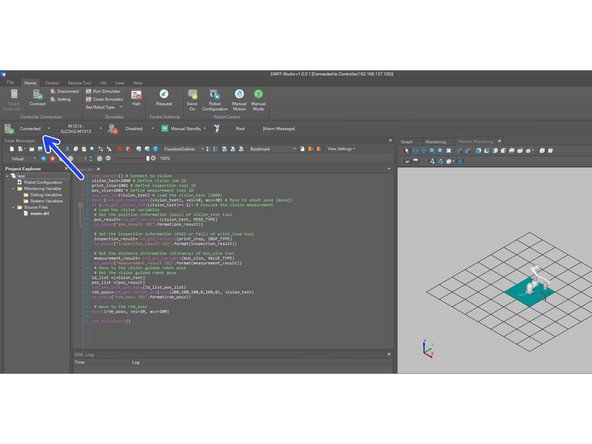
Then click on Connect in DART-Studio at the top left corner
-
If the connection is successful, the Conection box will display Connected If the connection is not successful please review step 5 and step 6 again
-
-
-
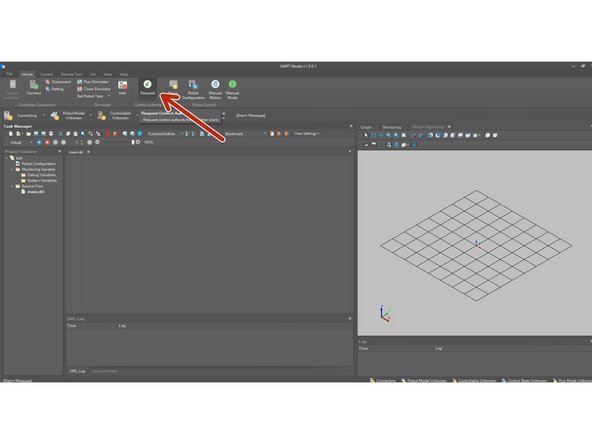
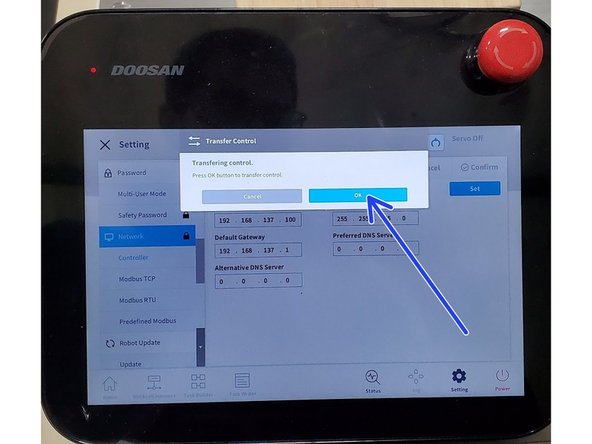
In the Home tab click on Request then a pop up will appear on the Teach Pendent
-
Tap OK in the Transfer Control Window that pops up in the TP (Teach Pendant)
-
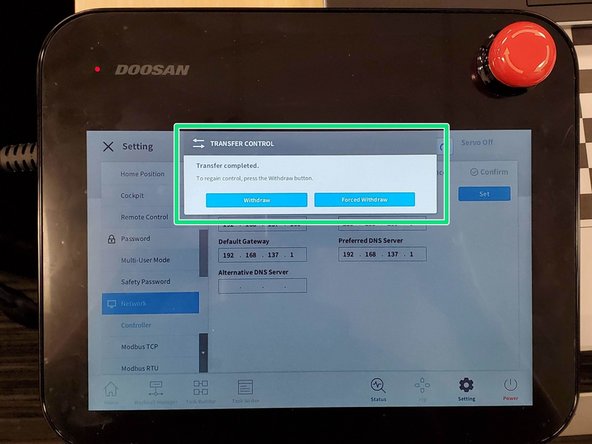
If the transfer control went successful you will see "Tranfer Control Completed"
-
-
-
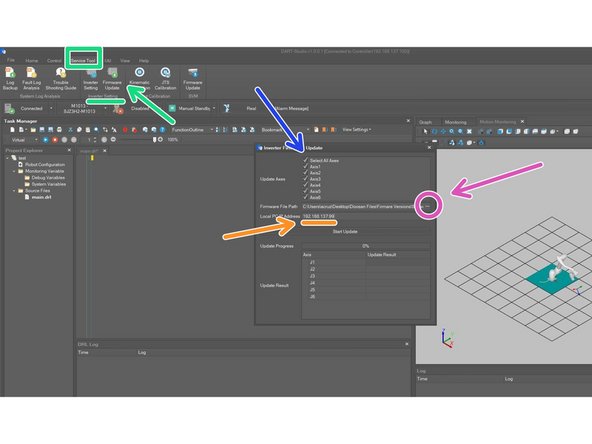
Go to Service Tool tab then click on Inverter Setting SECTION Firmware Update
-
Check the Select All Axes box
-
Enter the Local PC IP Address ''e. g. 192.168.137.99 '. Reference on Step 5
-
DO NOT enter the Robot Controller IP Address
-
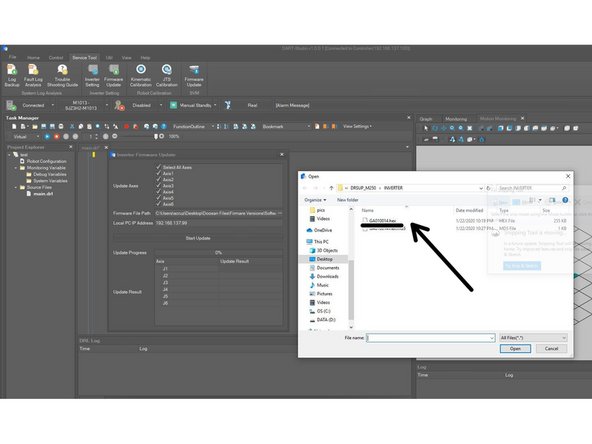
Search for the Firmware File Path
-
Open the file xxxxxxxx.hex. downloaded from Doosan Robotics LAB Software Update Package - >INVERTER. Refer on Step 1
-
-
-
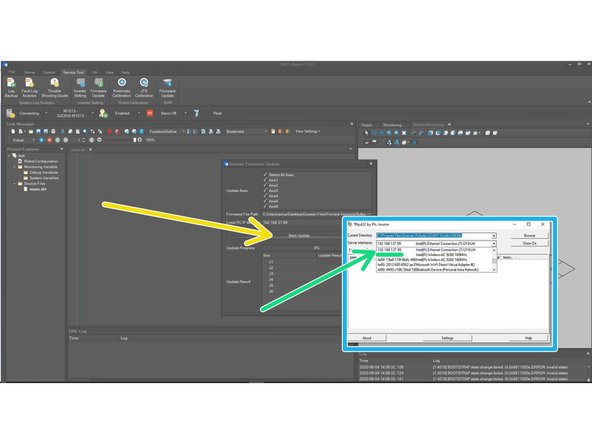
Click on Start Update
-
Then click on Yes to confirm to proceed firmware update
-
A windows named Tftpd32 will pop up then open drop-down menu (Server interfaces)
-
Select the same IP address as your PC. e.g If PC IP =192.168.137.99 select that IP then leave that window open
-
Wait for about 30 seconds to see any progress, screen will stay the same during the 30 seconds
-
Antivirus and firewall may affect the update. If the update fails immediately temporarily disable your antivirus protection / windows defender. (Ask IT for support on disabling antivirus or firewall)
-
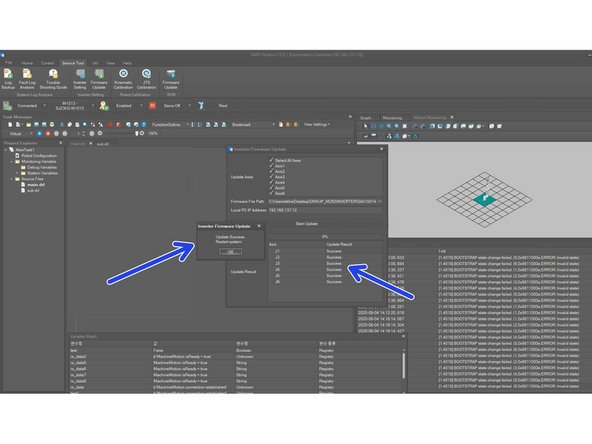
Restart the cobot (TP and Controller) after update is successful. A Inverter Firmware Update window will pop up confirming "Update Successful Restart System"
-
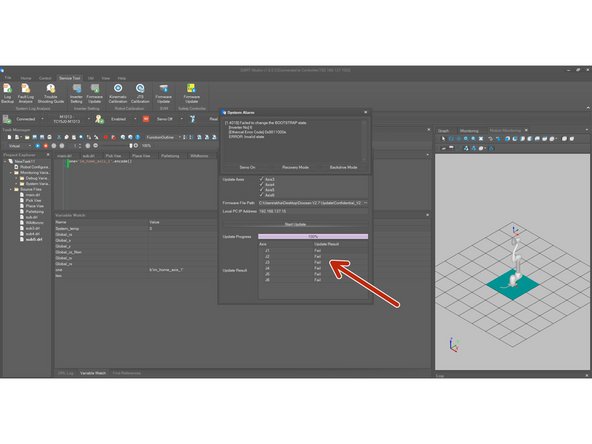
Even though the update goes successfully sometimes you might get a Fail Update Result. Restart the cobot and check the version information.
-
-
-
Main Controller Update Steps
-
-
-
2-GF – Main Controller Update by USB
-
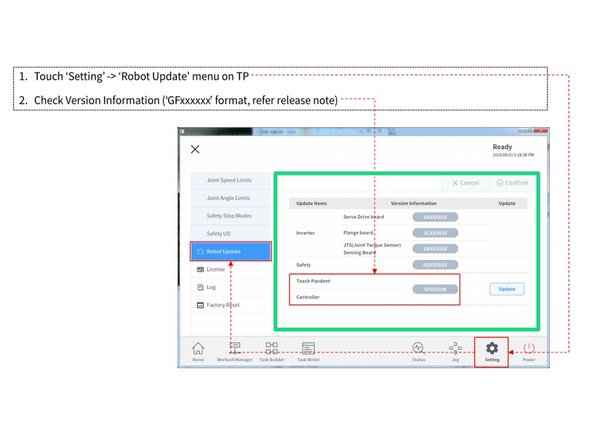
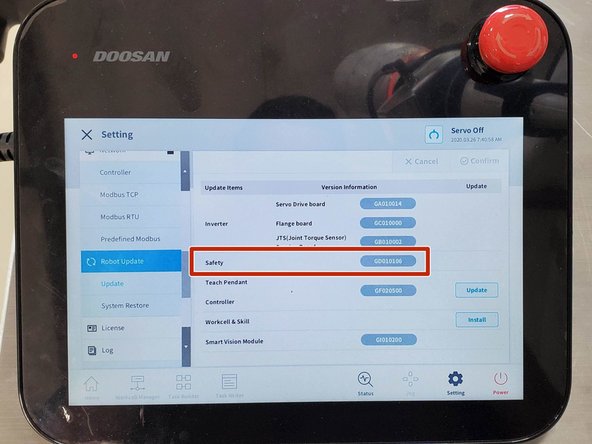
Check Version Information
-
Prepare a USB flash drive
-
Doosan Controllers require your USB storage devices to be in the FAT32 format
-
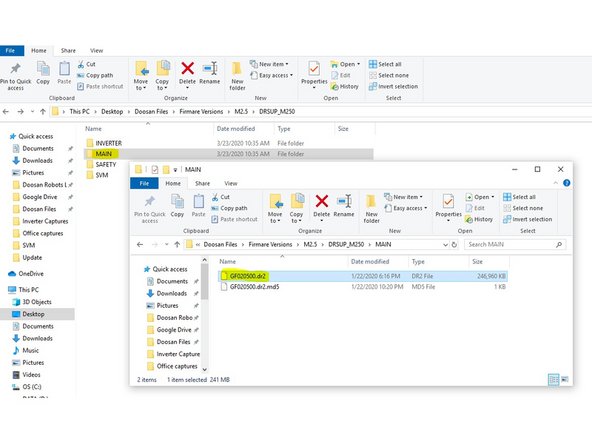
Copy Main Cotroller software update file GFxxxxxxx.dr2 to USB flash drive
-
Insert USB flash drive in the Controller
-
-
-
Go to Settings on the Teach Pendant
-
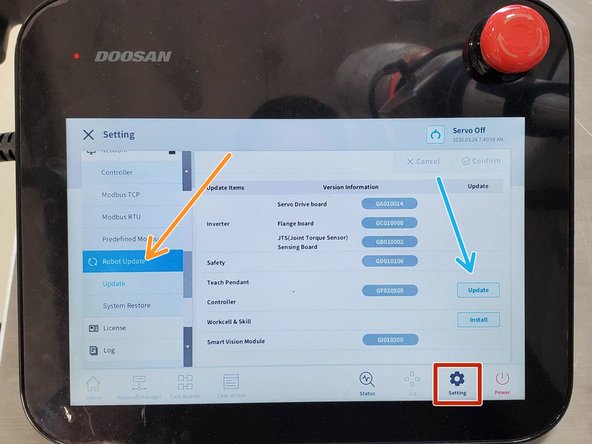
Go to Robot Update
-
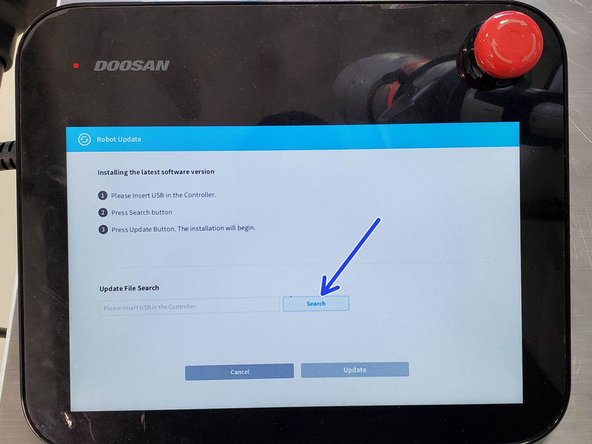
Tap on Update button
-
Tap on Search button
-
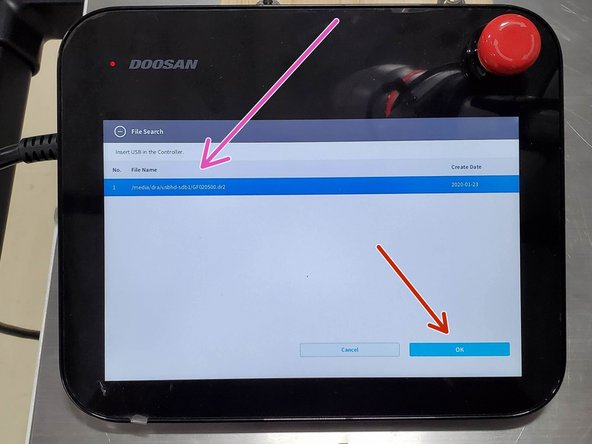
Choose update file .dr2
-
Tap on Update button. Restart the cobot (TP and Controller) after update is successful.
-
If the USB flash drive is not recognized try with different USB. We have noticed that not all the USB flash drives work.
-
If the version of update file is older than currently installed version, update will not progress
-
-
-
Safety Board Update Steps
-
-
-
Check Release Form for instructions and version information see in Step 3. This file is located in Doosan Robotics Lab in the software update package.
-
GD – Safety update by Micro-USB or Emulator XDS110
-
Go to Settings
-
Go to Robot Update check current version
-
-
-
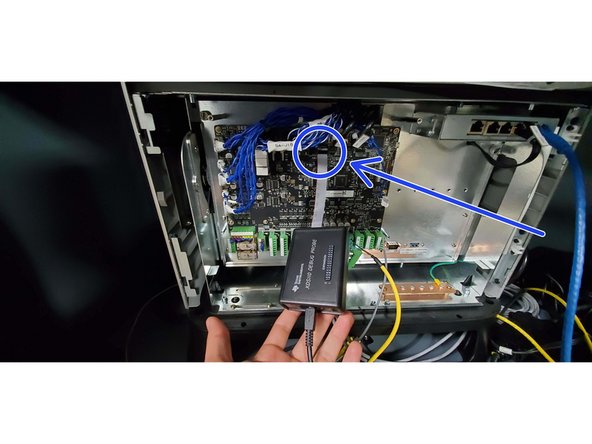
Be extremely careful while connecting the Micro-USB or Emulator. Make sure the female connector is even with the male connector to avoid bending or breaking the pins or Micro-USB connector.
-
Turn off the cobot and the controller
-
Turn on only the controller, teach pendant MUST be off
-
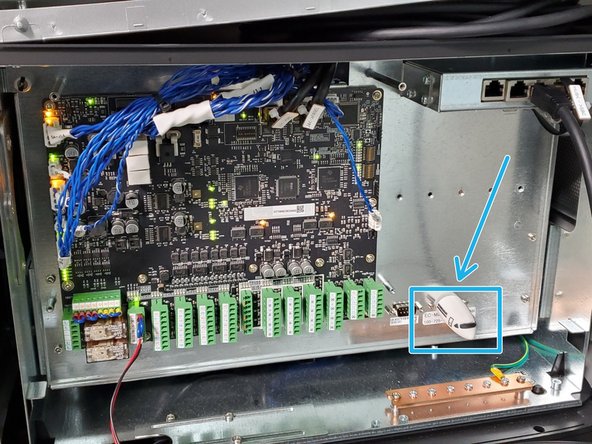
Check if the safetyboard has a Micro-USB Connector available as shown on picture 1
-
If Micro-USB is not available the upgrade has to be done by XDS110 Emulator. Reference in picture 2
-
Make sure drivers of Emulator are fully updated if updating by this method. They usually autoinstall.
-
-
-
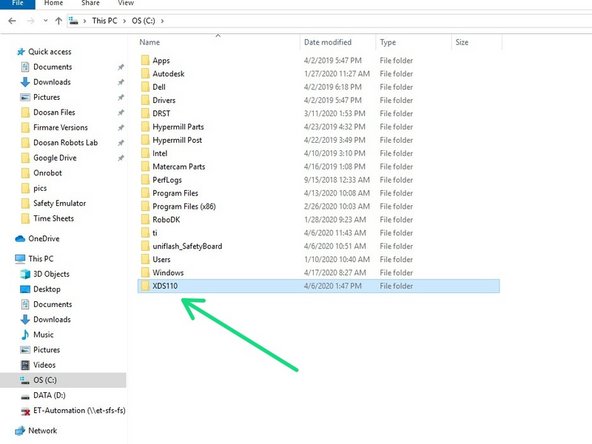
Create a folder named XDS110 in C drive e.g. C:\XDS110
-
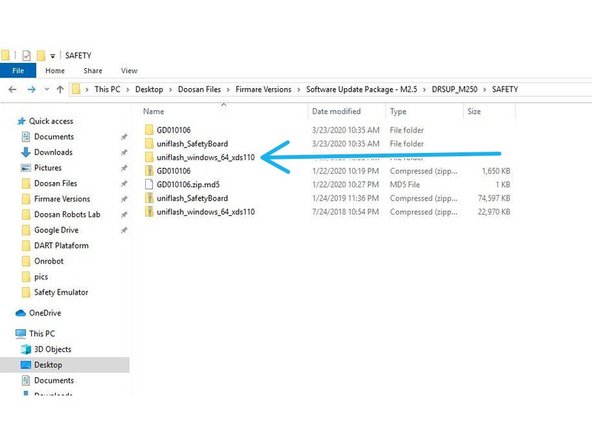
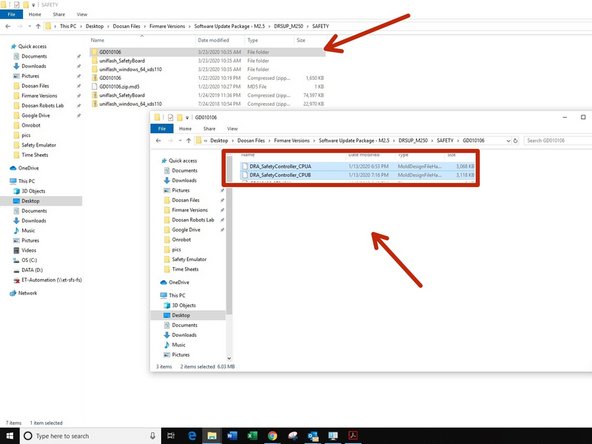
Unzip & copy the files from the SAFETY folder. For versions M2.5 or lower ( files from folder downloaded are in the update package from Doosan Robotics Lab) named uniflash_windows_64_xds110
-
Or you can download the files that have to be in the XDS110 folder here
-
https: //ellisontech.box.com/s/4kosijenee78pxjwmamtbphm9cs5j3ht
-
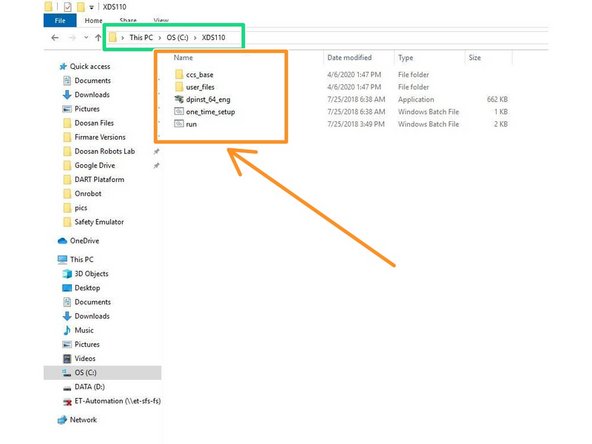
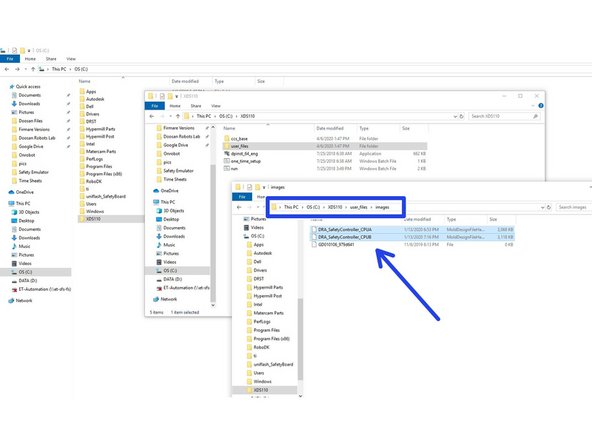
Paste the files in this path C:\XDS110 as shown in the picture
-
Delete all files in the next path --> C:\XDS110\user_files\images
-
-
-
Copy the images located in the Update Package Files in the SAFETY folder. If you are using the Emulator or USB copy the images for HW_Emulator
-
And paste to the next path --> C:\XDS110\user_files\images
-
Video of this process in the next step
-
-
-
Link to video (external drive)
-
-
-
Run command prompt as Administrator Press Windows+R to open “Run” box. Type “cmd” and then click “OK” to open a regular Command Prompt.
-
Go to path C:\XDS110 in command prompt. Reference video in the next step.
-
Run file one_time_setup.bat
-
Some pop ups will come up to install divers, please click Ok / Continue
-
Run file run.bat
-
Follow the update process until success. It will require to press any key twice
-
Restart the controller after the update is done. Check update info. If it didn't update successfully please re-do the Safety Board Update again.
-
If the TP keeps blank or unresponsive for more than 5 min. Restart the cobot again. Click here for more information about the Command Prompt basic commands
-
-
-
Watch this video as a reference
-
Restart the cobot (TP and Controller) after update is successful.
-
Link to video (external drive)
-